Tag Archives: frugal cooking

Being frugal when temptation strikes (is really hard)

Sigh. Being frugal is hard enough without the constant testing.

Today, Tony (the husband) and I were on a routine shopping trip at Target. Dish detergent (bought with a coupon), dog treats (also bought with a coupon), Raisin Bran on sale, and deodorant. We picked up our items, and because we’re masochists and we’re not doing anything else until we head out to a cookout later, we decided to browse a bit. Big mistake.

I don’t even bother looking at high ticket items anymore, so Tony saw it first. The Calphalon cookware we’ve been eyeing for over a year. On clearance. 50% off. Gulp.

As you know, we cook a lot. Aside from two Calphalon skillets we bought at Bed, Bath and Beyond with a gift card we got at the wedding, we’ve been using the same cheap cookware for two years. It’s still functional, but we’ve been dreaming of a new, high-quality set of cookware since before we moved.

So there it was. The exact set we’d been dreaming about for two years marked down from $200 to $100. It’s like the fates were trying to tempt us.

We stood in the aisle for about 20 minutes just looking at it and drooling. Tony, who I know wanted it more that I did because he does most of the cooking, tried to make it easy on me. “Let’s just go,” he said, gently pulling me away. “We don’t need it.” I knew he didn’t mean it, though. And I knew, despite his heroic attempt to save me from myself, that he was hoping I’d override his veto.

Mostly because it was something that I knew he wanted, I started making the standard excuses. “We’ve been so good this month. We deserve it.” Then the little frugal voice in my head that’s been getting louder and louder lately said, You want to celebrate the fact that you’ve saved money this month by spending money? How does that make sense?

“But because we’ve done so well, we should end up having about $300 left over at the end of the month from cutting corners in our budget. We could afford this without even breaking our budget!” To that, the little voice said, Um, up until two minutes ago, you couldn’t wait to put that toward your last little bit of credit card debt or your savings.

And of course, the excuse that used to trump them all: “We need it.”

But this time, that excuse wasn’t going to work. I reminded myself of the $100 Target gift card we received at the wedding. We discussed putting it toward new cookware, but ultimately talked ourselves into using it for an ice cream maker attachment for our stand mixer. Yeah, dumb.

To be fair, the cookware cost $200 at the time, and we didn’t want to spend money in order to use our gift cards. We did receive cash from relatives at the wedding, but we decided to use it as the first deposit into our savings account.

The fact remains, if we really needed that cookware, we wouldn’t have bought the ice cream maker first. You didn’t need that cookware so badly when there was something frivolous and fun you wanted two months ago, the frugal voice said. After all, gift cards never expire. Nothing was stopping us from saving up money to pay for the rest of it or saving the gift card until we saw a great deal like this one.

After I had talked myself out of it, it was Tony who started having second thoughts. “I guess when you think about it, we would easily spend $100 by going out to eat only four times. For that price, we can get brand new cookware that will help us cook hundreds of cheaper meals at home.”

As much as I hated to admit it, though, that’s not the point. We can easily make hundreds of meals at home with our old cookware without spending another $100.

Besides, do we really want to undo all of our hard work and restraint this month by spending money now when we’re so close to our first month of budget success? Celebrating your financial successes by spending money is a good way to keep yourself from ever really getting anywhere.

It was the hardest decision we’ve made since we decided to get serious about living frugally, but we walked away from the clearance cookware. Even though we had the money for it, and even though it was an amazing deal. Sigh.

I’m still questioning our decision. Eventually, we’ll need to buy new cookware. Will we end up paying twice as much for it and regret our decision to wait? That thought has definitely crossed my mind. But I just can’t risk getting off track now that we’re so close to our first successful month. We need to know we can do this, and we need to walk away from some good deals for a while if we’ve ever going to get ahead.

I’m sure someday, after many months of budgeting success, we’ll be able to make exceptions for things like that when the deal really is great and it’s something that we really could use. But right now it’s just too early to start making those exceptions. If we give in to every temptation from the very beginning, how will we ever get anywhere?

What do you think? Did we make the right choice? What would you have done?
Subscribe

Homemade bread! Finally!

My husband and I love to make foods from scratch. We think they taste better than the store-bought alternatives, and we enjoy the process of cooking them. We’ve mastered pizza crust, marinara sauce, Alfredo sauce, and chicken stock, to name a few. But we’ve never baked our own bread.

This past weekend we discovered a fabulous little bakery with the absolute best fresh bread I’ve ever eaten in my life. It inspired us to try baking bread on our own. It was surprisingly easy!

I followed the recipe for whole wheat bread that came with my stand mixer. We had all of the ingredients on hand except for dry milk, so I ran out and picked some up.

My husband, always the risk-taking cook, was curious to see how it would turn out if we shaped it into a boule and baked it directly on our pizza stone. I’m a cautious cook, especially when I’m trying something new, so I wanted to follow the recipe exactly by shaping it into a loaf and baking it in a loaf pan. We decided to make one of each and see which is tastier!

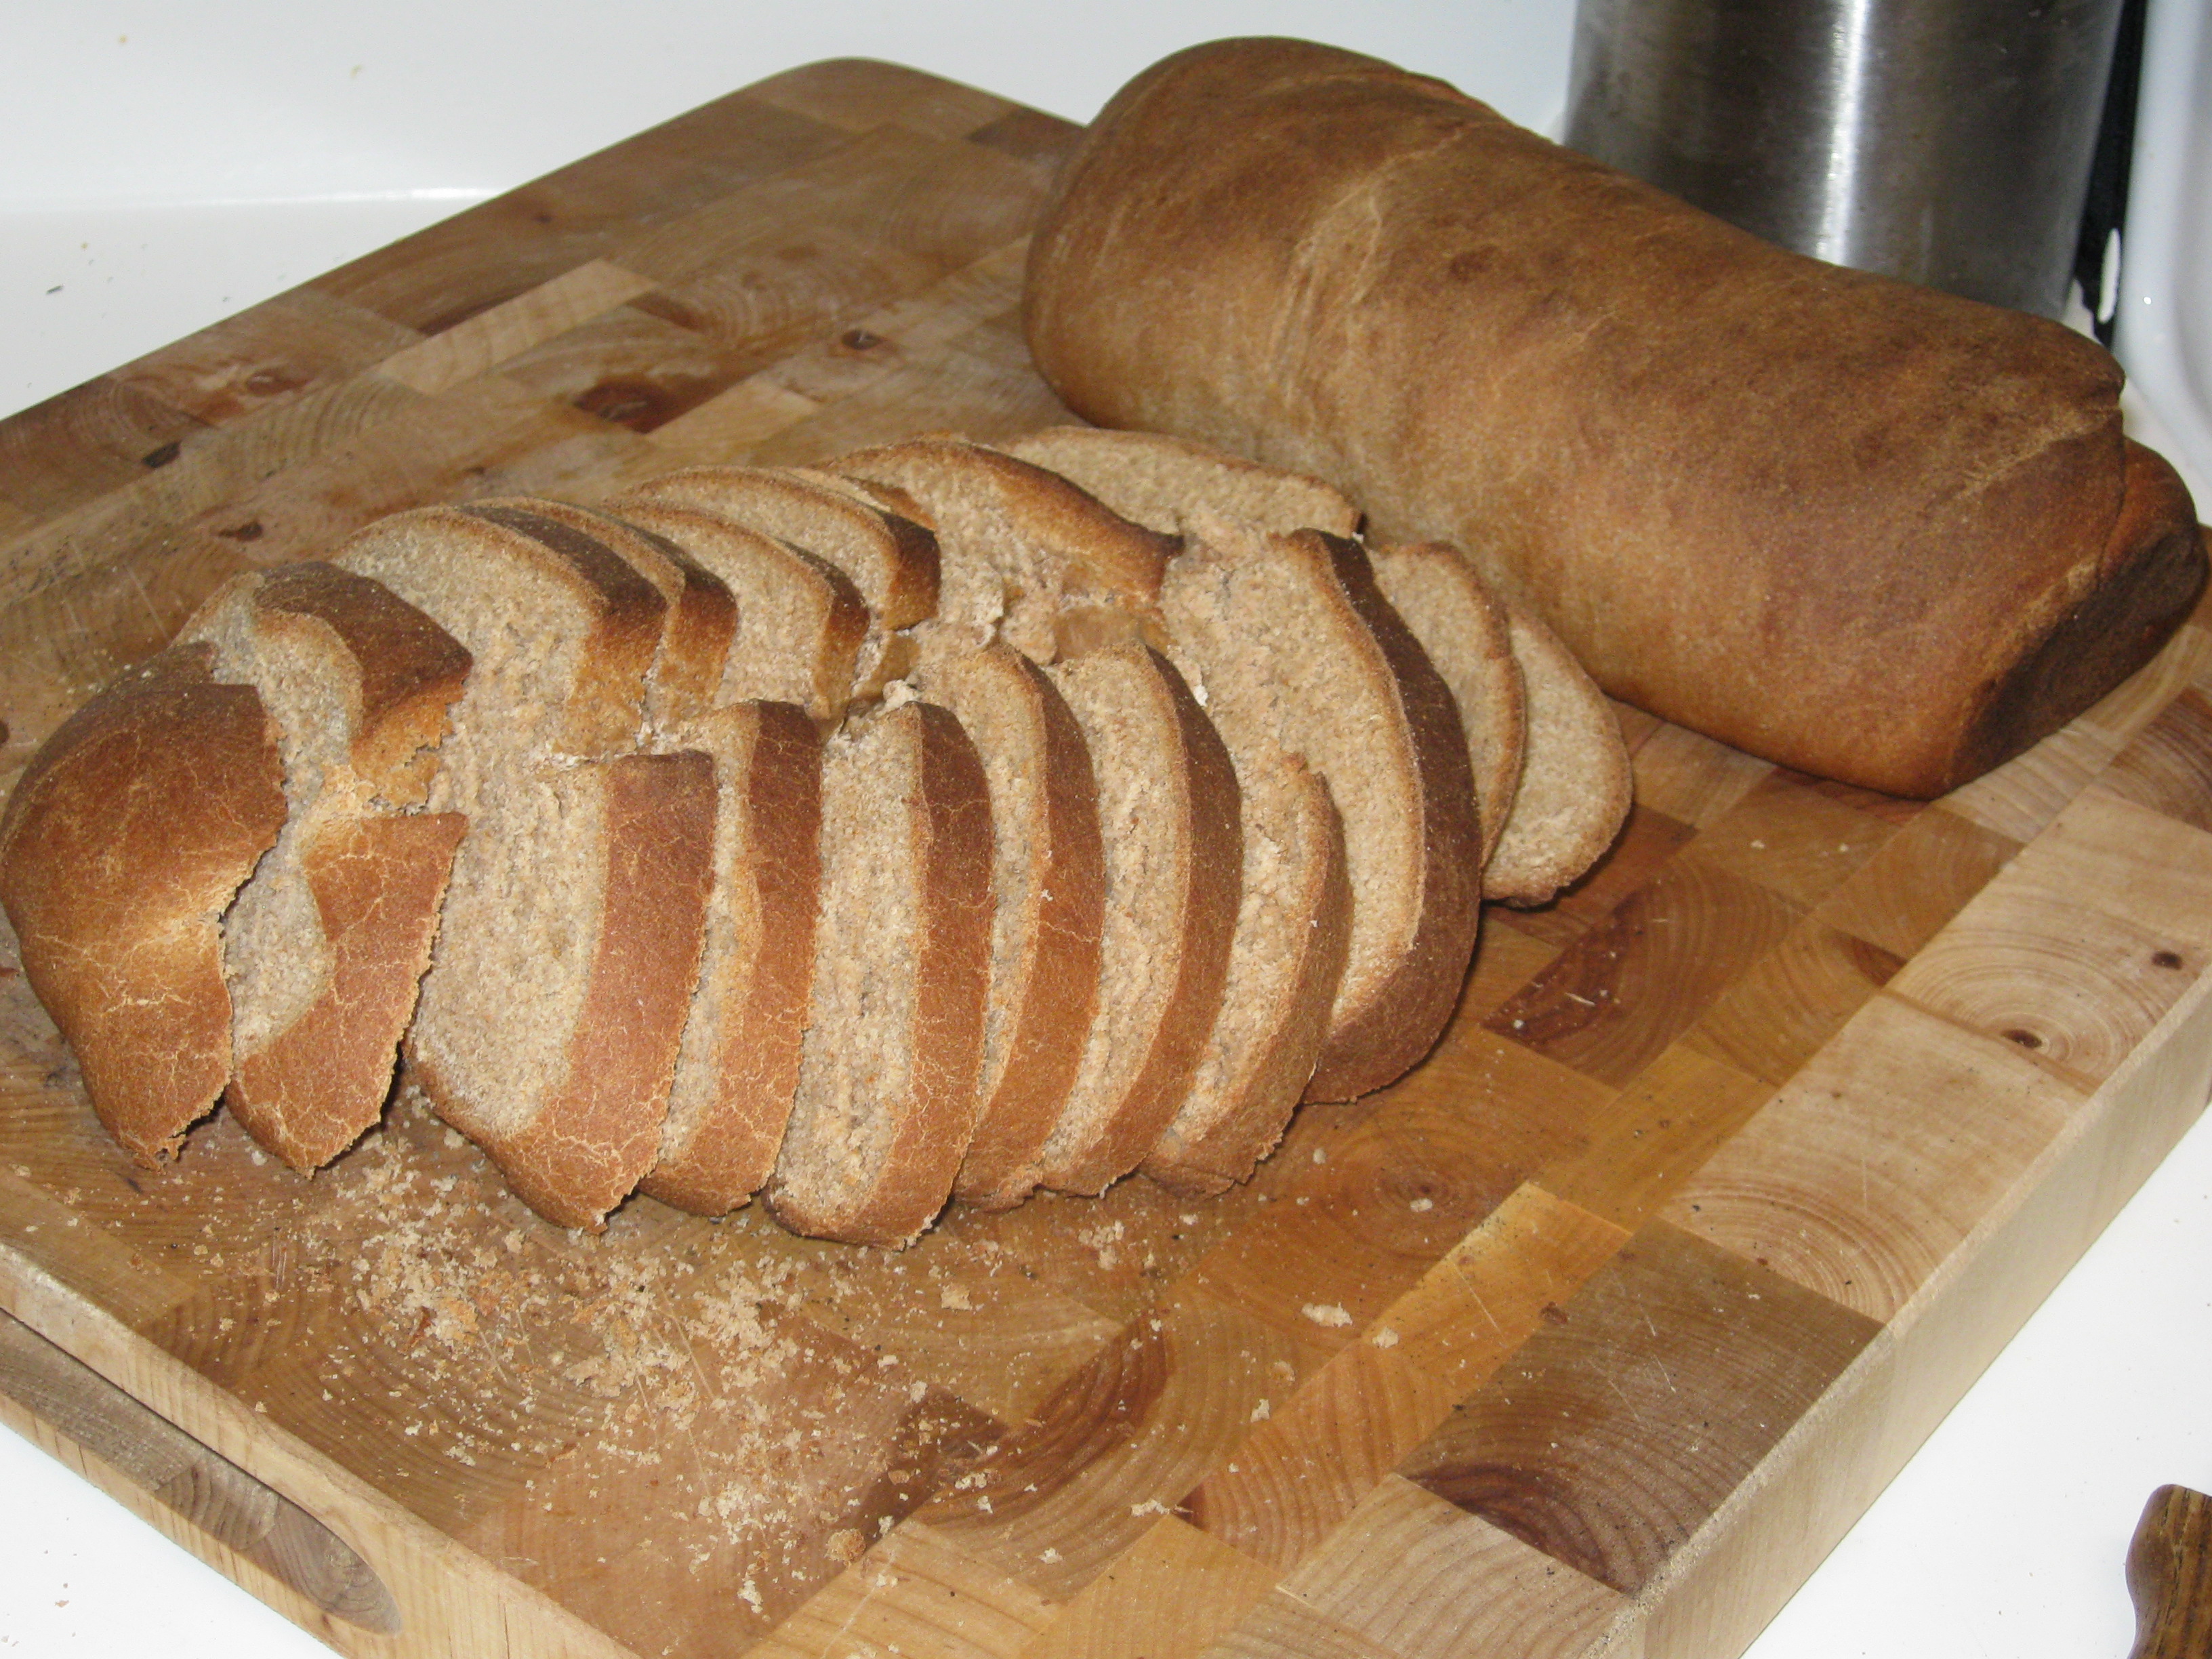
It was going great … and then I went to check on it about 5 minutes before it was supposed to come out of the oven. It was already overdone! Doh. I blame my oven and its crazy 50-degrees-hotter-than-what-it’s-set-on temperature.

It’s also denser than I’d like, which means I didn’t let it rise long enough. Hopefully I’ll get better at baking fluffy, soft sandwich bread with more practice. It still tastes pretty good even if it’s not so pretty, and it would definitely go well with a nice hearty bowl of stew. Not so sure about using it for sandwiches, though.

Like most of the foods we make at home, I’m not convinced that homemade bread is actually cheaper than the deeply discounted, mass-produced store-bought bread that we buy (does anyone have any numbers on that?!). But it sure did make the house smell good!

I also feel good knowing exactly what’s in this bread (mostly just whole wheat flour, dry milk, and yeast), as opposed to the long list of unpronounceable chemicals and preservatives in the store-bought bread ingredients list.

We don’t eat a ton of bread each week, so it would be totally doable for us to start making two loaves every two weeks and freezing one for the following week. I’m going to try it out! Yay for homemade food!

Any tips from bread-making experts would be greatly appreciated! What kind of shelf life can I expect from the bread that I don’t freeze?

Subscribe

Help! My grocery bills are ridiculous!

On the advice of Kacie at Sense to Save, I’m participating in Menu Plan Monday this week by posting my meal plan for this week. I’m hoping I might get some tips on how to lower our ridiculous $75-$90 a week grocery bills. Any advice is welcome and appreciated!

Blackened catfish fillets with rice pilaf (We bought 1/2 pound of fish on sale for $4.99/pound. The rice pilaf is just rice cooked in homemade chicken stock with onion, garlic, and seasonings added.)

Balsamic pork roast tenderloin (We had a tenderloin leftover from last week. We bought it on sale for $2.99/lb. and used it for two meals last week, too.)

Tacos with refried beans (Ground beef on sale $2.99/lb.)

Taco salad (We only use 1/2 pound of ground beef for tacos, so we’ll use the leftover taco meat for this.)

Roasted chicken with potatoes (The whole chicken we bought cost $6, and we’ll use it for two meals this week and a gallon of chicken stock.)

Chicken Alfredo (Made with homemade Alfredo and leftover roasted chicken.)

Homemade cheese pizza (Homemade pizza sauce and crust. The most expensive part of this meal is the cheese, which we buy in bulk at $5 for 2 lbs. because we make pizza once a week.)

I painstakingly plan these meals out based on the sales at two separate stores, and I try to use everything up and stretch things out. I’m really frustrated by our continually high bills. We don’t buy extra snack foods, and we eat leftovers for lunch.

We do buy whatever fruit is on sale (this week strawberries, blueberries, and two peaches). The grand total for fruit was $5.25.

I realize my meal plan is meat heavy, which is why I want to try to plan more vegetarian meals to cut down the cost. Our goal is to cut costs on groceries to $60 or less per week while still eating healthy, tasty meals. Any tips?

Note: We spent about $75 on this week’s meals, which is our average grocery bill. The other $15 of our grand total went toward bulk purchases that will last us a month.

Subscribe

Frugal cooking tip: Making homemade chicken stock

We use chicken stock for a lot of meals, especially in the fall and winter during soup season. But it can get pretty pricey since store bought chicken stock costs anywhere from $2 to $4 a quart.

Since we also like to roast whole chickens (we get two to three meals out of the meat), we decided to stop wasting the rest of the chicken and start making our own stock. It’s not difficult, but it is time consuming. However, it’s worth the time.

We pay about $6 for a whole chicken, but I’m not sure how to calculate the cost of the carcass since we get 2-3 meals out of the meat. Beyond that, you’re paying for the produce, which costs under $3 total according to my calculations. Not too bad since this recipe yields 1 gallon of stock. (You could probably actually stretch it out to 2 gallons. We only make one gallon because our stock pot is too small to hold 2 gallons of water with all of the ingredients.)

We adapted this recipe from Good Eats, but we’ve made some changes to simplify it. We’ve also omitted several ingredients. Feel free to try the Good Eats version if you’d rather get the recipe from a pro!

Ingredients:
3 to 4 pounds of leftover cooked chicken carcass
2 whole garlic cloves, peeled and crushed
1 teaspoon of salt
1 teaspoon of whole black peppercorns
2 bay leaves
Several sprigs of fresh thyme
1 to 2 gallons of water

Chop the following ingredients into large chunks:
1 large onion
3 to 4 carrots, peeled
3 to 4 ribs of celery

Place the ingredients in a large stockpot. (Tip from Good Eats: Use a steamer basket placed upside down on top of the ingredients to prevent everything from floating.) Then add the water.

Cook on high until it begins to boil. Turn it down to medium low and simmer gently 6-8 hours. Skim the surface of the stock with a spoon occasionally to remove the “scum” that builds up on the top. You’ll periodically need to add more hot water to keep the ingredients covered as the liquid cooks down.

After 6-8 hours, the bones should be brittle and easy to snap in half. That’s how you know it’s done. Strain the stock into another pot, and throw away the carcass. Let it cool before transferring it to quart-sized Tupperware containers. (We like to store it by the quart so we can thaw only what we need. We also like to split one of the quarts into 1-cup portions so we can use the stock for smaller recipes like rice pilaf without thawing a whole quart.) Refrigerate overnight.

In the morning, there may be some solid fat on the surface. Skim it off and the stock is ready to use. You can store it in the refrigerator for a week or several months in the freezer. If you choose to freeze it, just place it in the refrigerator the night before you need it to let it thaw.

Note: Always boil homemade stock for 2 minutes before using it to kill any bacteria.

If you don’t want to devote 6 hours to cooking stock, Tyler Florence from the Food Network has a shortened stock recipe that involves poaching a whole chicken for 1 to 1 1/2 hours. Then you just remove the meat to use for another dish, and the remaining broth is similar to chicken stock. We’ve never tried this recipe because we prefer to roast the chicken. Roasted chicken is much tastier and moister than boiled chicken. But if you try this recipe, let me know how it works out!

Subscribe

Saturday Grocery Round up

We had quite a day. It started with our research at the farmers market and the co-op. We didn’t make any purchases at either, because we were waiting to see what our best best would be. Ultimately, we decided to stick with trips to multiple stores to get the best deals.

Today was particularly intense, because we were out of a number of staples that we buy in bulk (coffee, mozzarella cheese for homemade pizza, and black peppercorns). Those are all pretty pricey because we buy enough to last us a little over a month. We also bought a whole chicken that we’ll roast for dinner tomorrow night, then use the leftovers for chicken Alfredo later in the week. We use the carcass to make a gallon of chicken stock.

We went to two grocery stores and Costco for the coffee and cheese.

Our grand total? Still a depressing $91. Sigh. I feel like I’m failing miserably at bringing our grocery bill down to $60 a week.

I know it’s time to make some drastic changes, but I’m just unsure of what my next step should be. Unfortunately, grocery store coupons don’t help us much because the only processed foods we buy are cereals (I do use coupons for that when I have them) and pasta. The rest is produce and fresh meat.

I know that cooking without meat is a big money saver, but we don’t have many vegetarian meals in our repertoire, and the ones we do have require expensive produce like grape tomatoes. Next week we’ll try to come up with some menus that don’t require us to purchase additional meat. We have some chicken breasts on hand in the freezer, but we usually buy some kind of meat each week. I think cutting out the extra meat will help, but I’m just afraid that our meal plans will begin to lack variety.

Anybody have any delicious vegetarian meal ideas to share?!

Subscribe

The best methods for freezing foods

One of the tactics we’ve been using to reduce our food budget is buying certain items in bulk, which is often cheaper per pound than smaller portions. But what’s the best way to freeze the excess so it won’t go bad before you eat it?

Good Eats, one of my favorite Food Network shows, covered the topic of freezing last night. Full of scientific facts about what happens to foods when you freeze them, the show gave some helpful hints for the best ways to freeze meats, vegetables, and fruits to ensure they’ll taste as good when you thaw them as they did fresh.

According to the host, Alton Brown, commercially frozen food is flash frozen. This is the best way because when food is frozen slowly, like it is in the freezer in your kitchen, big jagged ice crystals form inside the food. These jagged ice crystals perforate the cell walls and damage the food as it thaws. With meat, the perforated cell walls cause the flavor-filled juices to drip out as it thaws. For delicate fruits and vegetables, the result it a mushy gross mess.

Freezing food as quickly as possible to as low a temperature as possible leads to smaller ice crystals, less damage to the cell walls of the food when it thaws, and better flavor.

Obviously most of us don’t have access to commercial flash freezing equipment. However, one logical way to freeze your foods more quickly at home is to freeze in smaller portions.

Meats

For instance, if you buy a large cut of beef, butcher it and cut it into small, equally sized portions before freezing it. The smaller the portion, the less time it takes to freeze, and the better the food will taste when you thaw it. Once you’ve cut the food into smaller pieces, refrigerate it for an hour to chill it down before freezing.

If you buy a whole chicken or turkey, the best way to freeze it is to first cut it into smaller pieces. If I planned to roast it whole, I would probably just freeze it whole anyway, even if it’s not the best way. Sometimes simplicity is more important. But you get the point.

Vegetables

Vegetables are a little more complicated. Have you ever frozen a vegetable and discovered that it was a brown mushy mess after it thawed? According to Alton Brown, this is because the water is the only part of the vegetable that actually freezes. Everything else turns into a syrupy super-concentrated goo that never completely freezes. Chemical enzymes that aren’t affected by cold spring into action and begin decomposing the food while the large ice crystals from slow freezing break down the cell walls. The result is a brown, mushy mess.

To prevent this, Alton suggests blanching your vegetables, like peas, in boiling water for one minute and immediately shocking them in an ice bath for another minute to neutralize the enzymes. Dry them thoroughly, then lay them out in a single layer on a sheet pan and and refrigerate them for an hour before transferring the sheet pan to the freezer.

Freezing them on a flat surface allows each pea to freeze individually and much faster than if you lump them all into a mass. Once they’re completely frozen, you can store them in a Ziploc bag or Tupperware. (This method also works for blueberries, just don’t boil them first.)

Fruits

These enzymes are also responsible for the gooey mess that results from slow-freezing fruits. However, fruits are too delicate for the boiling method.

For fruits, like peaches, Alton suggests grinding vitamin C tablets with paprika and sugar, cutting the fruit into smaller pieces, then coating them in the powder. Put the powder-covered fruit into a Ziploc bag, remove as much air as possible, and freeze it flat. The vitamin C effectively neutralizes the enzymes and prevents the gooey mess without compromising the flavor of the fruit.

The episode also offers a ton on helpful advice on freezer organization and tips for proper storage of frozen foods. If you want to catch a rerun, it will air on The Food Network Saturday, August 16 at 10 p.m.

What freezing methods work for you?

Subscribe